Week 1: Basic Materials to get started with oil painting


Scroll to the end for a condensed list-

Everything you need to get started with Oil Paint!

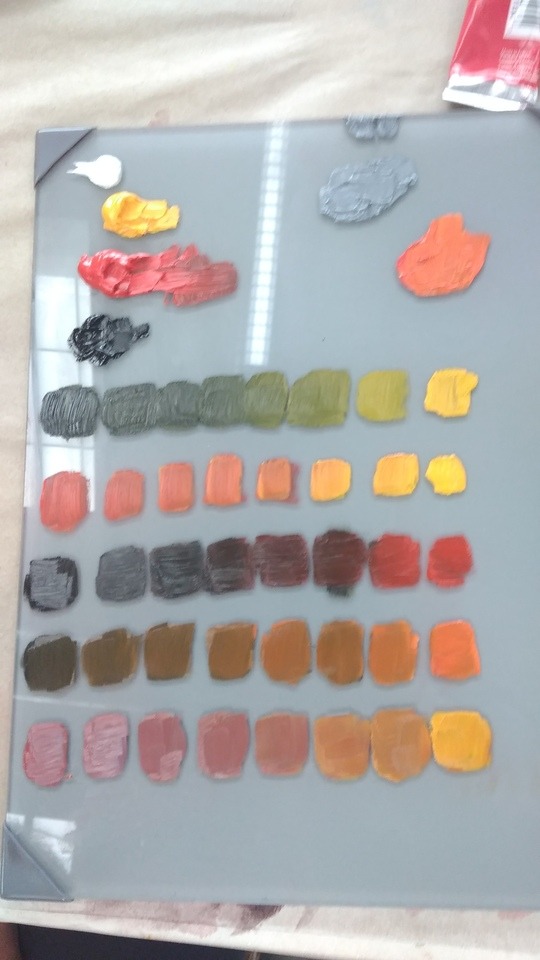
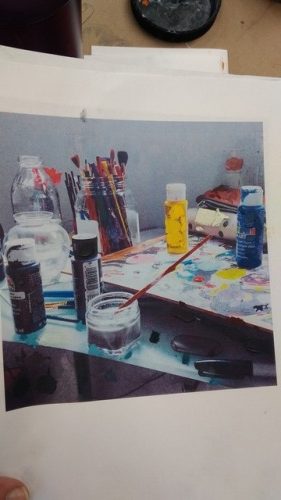
You have the option of using Oils or Acrylics based upon your preferences.  Oils have the luster generally associated with classical paintings and stay wet longer which allows them to blended more easily. Acrylics have the benefit of being water soluble, so you don’t have to buy paint thinner and linseed oil. They also dry quickly. They both have their benefits and drawbacks.  There are student grade paints and professional paints. I’d recommend just getting the student grade paints since there is a huge price difference. The brand can be Umton, as in the picture below.

Paint

Oil Paints

  • Cadmium Red Medium

  • Cadmium Yellow Medium

  • Pthalo Blue or Ultramarine Blue (Pthalo Blue is more electric and fluorescent looking. Ultramarine is beginning to get a bit more purple and is a softer color)

  • Titanium White

Acrylics

  • Cadmium Red Medium

  • Cadmium Yellow Medium

  • Pthalo Blue or Ultramarine Blue

  • Titanium White


What to paint on?

Figuring out what to paint on is a personal preference. But can be determined by cost and other factors. Pick one of the below to paint on.

Canvas

  • Canvases have been used for centuries as a painting surface.  

    • You don’t have to prepare the surface for painting.

    • They’re more expensive.

    • You can use the textured surface for certain effects.

Masonite

  • Is very cheap. You can get many small pieces (30cm x 40cm) cut at Obi or Bauhaus for free. I often get 30 pieces cut at once and it costs me around 500Kc.

  • Are durable

  • Has a rigid surface so you don’t have to deal with the movement of a canvas.

  • They’re smaller so they’re easier to store if you’ve got hundreds of paintings.

  • Students tend to be less precious with them, which is good, since sometimes a nice white canvas is an intimidating thing to “ruin”  

Watercolor Paper

  • You’ll have to prepare the surface by buying Gesso (Šeps) or acrylic medium.

  • You can buy a “blok” of them and have many pieces to work on quickly.

Super Budget Surfaces

  • You can paint on cardboard as long as you prepare it first with Gesso or Acrylic Medium.

  • You can dumpster dive pieces of wood, drawers, and other materials from the garbage.  (Just make sure it’s actually garbage and you aren’t stealing someone’s stuff who is just moving out of their apartment.)

  • Buy crappy old paintings at Bazars or Flea Markets (Kolbenova) and paint over the surface of them, or add new characters to them.


What’s Gesso?

Gesso

Gesso prepares a surface for painting. There’s two types. Oil based, and acrylic based. But you don’t have to worry about that yet. Just get the acrylic based gesso no matter if you are painting with oils or acrylics. Gesso performs a variety of purposes. For one it smooths the surface of a canvas or panel (masonite) , and it also protects the wood, paper or canvas from linseed oil. Linseed oil will eat away at these materials over the years. So there are archival qualities that make using gesso essential, especially if you want to make sure your painting lasts for a thousand years.

Acrylic Medium

Another option is to use Acrylic Medium to prepare your surface for oil paint. Acrylic medium is clear and can also be used with acrylic paints to create transparent surfaces.

Brushes

Get a flat brush. That means it’s rectangular, and not like the pointy brush they use in cartoons. The brush below is a ½ from the company AMI. It costs like 60kc and is available at Alta Mira. You want your bristles (that’s the hairs of the brush) to be kind of springy and firm.  
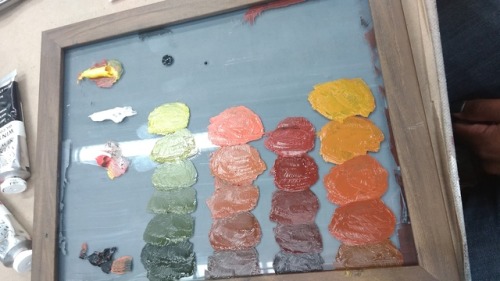
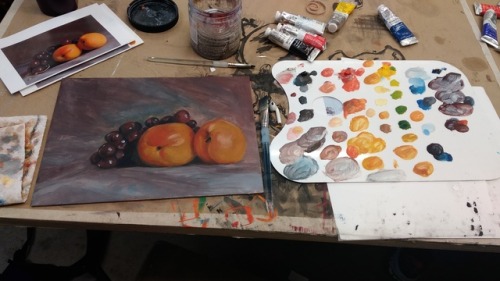
Palettes

Get a piece of glass, and a scraper (A razor). Or coat a piece of cardboard with Gesso and you can also use this as a palette.  I’ll bring some extra pieces of glass, but I only have a few.

Varnishes, Mediums and solvents

Cobalt Siccative

Cobalt Siccative is a medium which makes oil paint dry faster, and gives it a bit of a glossy finish. Add it to your linseed oil (in very small amounts)

Paint Thinner/Turpenoid/Redidlo

Paint thinner is used to clean your brushes and to thin your oil paint. We will be using it mainly in a jar to clean our brushes.  You don’t need such a large container of it. Or maybe you do, if you want to paint a lot.

You’ll also need a container to put your thinner into. A jar with a lid that screws on tightly is a good option.

Linseed Oil

Linseed oil is the oil that is contained within oil paint. Often we need to add more oil to the paint in order to extend it, and make it easier to manipulate. You’ll also need a small container to hold it. A shot glass works well. Just don’t accidentally drink it.

Damar Varnish

Damar is also optional but is used on a painting once it is completely dry. It will also darken your dark colors more and give your surface a unified glossy appearance.

Miscellaneous

You’ll need a paint rag to clean your brushes, and use while you are painting.

Condensed List

Oil Painting  

  • Cadmium Red Medium (Hue) (Brand Umton)

  • Cadmium Yellow Medium (Hue)  (Brand Umton)

  • Pthalo Blue or Ultramarine Blue  (Brand Umton)

  • Titanium White

  • Gesso or Acrylic Medium

  • Flat Brush (the rectangular ones.) Brand AMI. see photo above.

  • Paint Thinner (Redidlo)

  • Glass jar with lid. (Eat some jam)

  • Linseed Oil (Lineny Olej)

  • Shot glass or bottle cap

  • Canvases, Masonite, Cardboard, or Old Wood

  • Palette (Glass or Cardboard) and paint scraper.

  • Painting Rag (tear up an old t-shirt)

Acrylic Painting

  • Cadmium Red Medium (Hue)

  • Cadmium Yellow Medium (Hue)

  • Pthalo Blue or Ultramarine Blue

  • Titanium White

  • Glass jar with lid.

  • Paint rag

  • Palette (Cardboard or glass)

  • Canvas, masonite, cardboard, or wood

  • Painting Rag (tear up an old t-shirt)

  • Gesso or Acrylic Medium

Week 2: Seeing values and getting started with brush and ink

This lesson focuses on value and how to recognize it and begin to paint it.

live-trace-vector-portrait.jpg

In addition to these exercises you also need to create a blog to track your progress.

First you need to make a Tumblr.  Go to Tumblr.com and sign up.

Once you get used to the interface you'll see that you can easily create different posts.

Make these different tags for each post. You will begin to collect research about the ideas that certain painters were interested in. You're going to be collecting images of artists you find inspiring. You will be taking notes, and posting pictures of them. You'll be uploading images of all your work at different stages of progress. And you will be collecting source material that you can work from.

To see what one of these blogs look like go to mine at lunarcave.com

Tag posts with tags like “my work” “research” “artists to look at” “videos” and “notes”

Then get an Instagram downloader app. Download images that attract your attention. Investigate different movements, download images that get your attention. Go to the library, and check out books and then photograph pages that get your attention. Look at the ideas artists are working with, investigate them deeply and look at all the connections they have to literature, science, and philosophy. Make videos of yourself talking about the ideas you’re interested in while looking at the work you’re making in the studio (you can set these to private but it’s important to be comfortable talking about ideas)

Make your blog with a theme (the theme I use is called "masonite" that allows a bunch of images to be seen together (3 or 4 column theme) then you get to see your work alongside the artists you admire, and you can read your own notes and see them next to the research you are doing. If you do this for a year, even if you don’t know where you’re starting, you’ll start seeing connections and you’ll be able to build on them.


Week 2

Today we are working with brush and ink and painting primitive shapes/forms. There will be a lecture on symbols, lines, and ways of seeing value as opposed to line. 

Value scales 

Primitives from your head

Cone, Square, Sphere, Cube, Mashup of two primitives

Primitves drawn from life

Cone, Cube, Sphere, Dodecohedron (15 minutes each)

Magic Bean Drawings (4 of them) 


Lunch

Selfie. Take a picture of yourself with “form lighting” . Which means that the light should be coming from above and illuminate one side of your face more than the other. You will then make a drawing based upon the photo.


artist of the week

Ralph Steadman

tumblr_inline_peoznbZXYb1qa8axs_1280.png

Week 3: Nocturnes in Black and Red

Today we'll start by looking at some inspirational works done in only red and black.

Look at the diversity of value present in these paintings, and just how much can be done with only two colors.

w3i1.png

In this Rothko we can see how evocative these simple color combinations can be.

w3i2.png

Look at this Seurat charcoal drawing and pay attention to how his shadows and dark areas fade into the background. All the darks are connected and although there is very little detail, the painting and the subject matter are quite clear.

w3i3.png


w3i4.png

Nocturnes are paintings done at night. In this painting there is only one little spot that's actually white, and that's the moon. Look at how the artist has created a nighttime scene by using a small amount of values with subtle manipulation.

Today we'll start by learning how to mix paint on the palette and how to use our materials properly.

One of the most important aspects of learning to paint may sound simple, but it's also something that is going to stay with you for a long time. We're going to begin by focusing on how to make paint that has the proper consistency for oil painting.  Beginning painters often use too much paint thinner, or use too much oil, and that's why before we begin painting anything we're going to be focused on simply creating the right consistency of the oil paint.  The video below gives a good demonstration on just how to create the perfect consistency of oil paint so your paint will go on your canvas, and cover your canvas fully.

Once you have filled up your palette with a variety of colors and got a feel for them you need to take a photo of them. Remember, that documentation is an important part of this class, and that you are working towards creating a portfolio of your work.  By looking back on all of this documentation you can also see clearly what you've learned every class, and how it's building.

You've also got to paint on something, and making sure your surface is primed properly is the first step in success. In this video you can see how to prepare a canvas for painting, by mixing up a brown and using a lot of thinner and then wiping it away. You will be preparing your canvas like this before beginning your painting.


Once you've got your surface prepared, and are comfortable making proper consistencies of oil paint you will make a value scale using only black and red.

w3i6.jpg
w3i5.jpg

(student work)

Then you will make a cube and sphere using only black and red.

After you've made your sphere and your cube, you will get a still life object and paint it using only red and black.

After the lunch break, you'll come back with an image on your phone of an architectural structure of some kind. You'll be making a painting of these using only black and red.

Here are some examples of student paintings


Week 4: Getting to know yelloooooow and getting to know blue too!


So now that you've mastered using red and black you're going to move on to using yellow and blue! You've now suddenly got a full palette at your fingertips and will be able to make an unbelievable amount of colors just from these three. Much like how all of music is based off just 12 notes, all the colors of the world are made from only a handful of primaries.

You may have wandered into art stores over the years, and gazed up at that big wall of paints in a variety of exotic colors and found yourself at a loss of where to start. Just let me remind you, that the more limited your palette, the easier it's going to be to make color harmonies. Basically this means that if you mix a green, it's going to "go" with your other colors better if you mix it with those colors.  For this reason, we will be using only the primaries and the colors we can make from these during the beginning of this course.

So lets get into it. For today's lesson we'll start off by creating 4 different value scales. These will be done in green, brown, orange, and red. You can look at the examples below to see how these look. Did I mention that you should be documenting all of your progress in your blog? And that you also need to be doing some research into the materials and techniques of other artists, as well as creating a collection of inspirational painters who you look up to? Yeah, so do that. I can't stress enough how important it is to document your work and organize it.  It may not seem apparent now, but as you collect more images, and progress you'll be able to see things come together more and more.

Now I'm going to introduce a type of color which is often used in painting and that is something called "Chromatic Greys" . A chromatic grey is a color that has all three of the primaries in it. Basically, you can mix up your red, yellow, and blue and you'll end up with a muddy grey color, from this grey, you can push the color more red, or yellow, or blue, or whatever. It was actually common for master painters such as Rembrandt to largely paint with greys that have subtle fluctuations towards one color or another.

grey.jpg

Experiment with making a big pile of muddy grey, and then create a small abstract composition with subtle fluctuations in a variety of colors like the example above.

grey2.jpg

Paintings are often composed of chromatic greys with areas of color that pop. Because the more saturated colors draw our attention, we often don't see large areas of a painting that are done in these greys.

Once you've completed your small abstract composition in chromatic greys, we'll move on to another concept which you'll find often in a variety of paintings. This is the idea of hard edges and soft edges.   For this assignment you'll be shown how to do dry brush blending .  Dry brush blending allows you to blend two colors that are sitting right next to each other by utilizing a dry brush. You can see below how this can be done.


Now, when looking at a lot of different paintings you'll start to notice that they're all made up of hard edges and soft edges. This is really apparent in drapery studies, and during the renaissance apprentices were told to do studies of drapery for precisely this reason.  Look at the image below and try to find the hard edges, and the soft edges, and think about how the light and form is illustrated by utilizing these two different methods of applying paint.

zubaran.jpg

Zubaran

Now, for the final exercise today we'll be filling a canvas with nothing but clouds. These clouds can be imaginary, or they can be done using the image below. The goal of this exercise is to get as much experience as you can playing with hard edges and soft edges.

clouds.png
cloud-painting-1.jpg
cloud-painting-2.jpg

Student work examples

paper-painting.jpg

Bonus Painting! If you're looking for extra credit, then attempt the crumpled paper challenge, and simply crumple up a white piece of paper, put it underneath a strong lighting source, and then paint it! It's all hard edges and soft edges and is a real challenge for artists of all experience levels.

For next week you will need to bring in an image of a small natural still life from your daily life. Try not to pose these photos, but just look around where you live, and take a bunch of photos of small objects throughout your room.  Often these accidental still lifes are more interesting than those which are intentionally created. You will painting from these next class, and you must bring in a printed copy of your image in order to complete the next assignment. So come to class prepared with a printed copy of your image in hand!

zubaran.jpg

Week 5: Accidental Still Lifes


Today we will be working from the images of our accidental still lifes that you've brought to class.  This printed image is your ticket into the class, without it, you'll have nothing to do! We will begin the painting by lightly sketching with oil paint, and then we will mass in the darks, and finally the highlights. Our artist to look at this week is Duane Keiser, and he's also made a great time lapse video of his process.  Look at how loose he begins and how he works the entire canvas at once then slowly refines the painting and gets into more detail as it progresses.  It is very important to understand how painting on top of wet paint works to avoid a muddy canvas. Before starting on your canvas, you will be working on a few thumbnail sketches with ink and brush of your image outlining the major value shapes. This will serve as a guide once you jump into the painting with oil paint.

It is imperative that you bring your printed image as well, because you're also going to be color matching to that image. This means that you're going to mix up a color, and then actually paint small sections of your printed image to ensure that you've mixed up the correct color